Saturday, 19 November 2011

Day 15 - Delicate Print

Hi Guys, 
I'm Charlie and I blog over at Charlies Wonderland!
Rachel has very kindly asked me if I would care to fill in for her while she is away and continue with the 31 day challenge! 
I picked Day 15, delicate nails.... Why oh why I did is beyond me! I was struggling and struggling to think of something that did not include stamping (due to lack of stamping gear .... please santa!)  
So anyway, I went to a wedding (sounds odd as I am typing this on Thursday in preperation for my very busy weekend!!) anyway, I went to my future (i hope) brother and sister in laws wedding yesterday and I knew how I wanted my nails, due to them being bitten right down I also knew it would call for some falsies!  
So off I popped to the cheapy shop where I get all my false nails from, and I got some for 99p! I also picked up some little pearls while I waws there, they can be used for allsorts they are nail specific ones. 
I got home and set to work. I knew Id have a hard time trying to stick the pearls on once I had the nails on my fingers so I decided I would do the nails first then stick them on!
Never Again!! I spent most of the afternoon chasing nails around my desk, and getting them stuck everywhere! Oh and then when I did finally stick them on realised I had forgotten to make them shorter so they are friggin huge!
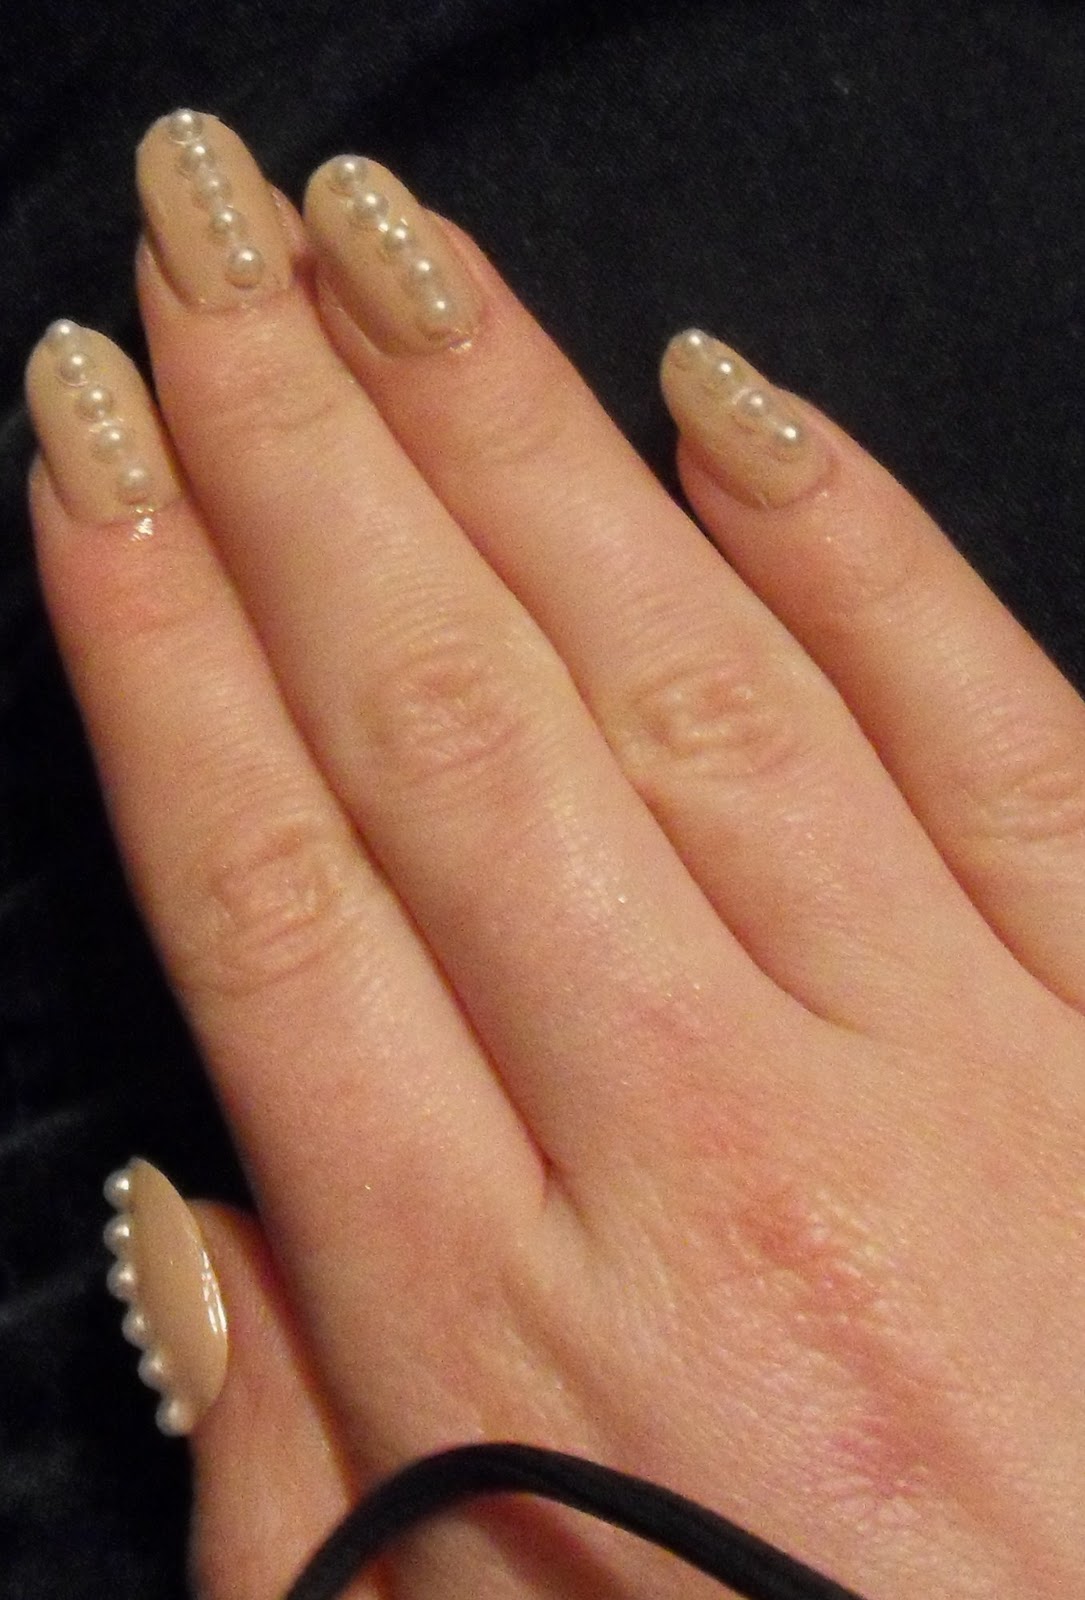
Anyway so I eventually finished and this is what they look like, I hope that you like them, I think pearls are very delicate so it does go with the challenge theme!


 I used Ciate - My fair Lady as the base, then popped the pearls on whilst still very slightly tacky, and finished with a top coat, much easier than it sounds!

A lovely close up, should of picked a better nail haha


See how I mean the nails are very long!!!


In the natural (dusky) light of my window!

There you have it guys, my delicate nails!

Check out my blog for other nail (so called) art! 

:D

Charlie
xx

Friday, 18 November 2011

Day 14: Flowers

Hi, everyone!! I'm Sarah from See Sarah Swatch, and I am so excited to guest blog on here! Thank you, Rachel-Karina!:]

Today, continuing the 31 Day Challenge, I have flowers for you!


This is 3 coats of my franken [a polish that's mixed by hand using other polishes & glitters & etc], Dusk, with Orly's Le Chateau stamped over it! I lovelovelove Le Chateau for stamping, it's so pigmented, but you can still see the teal-ness of it:]
& for fun, here's one coat of my franken alone:
It's a light purple with red shimmer and little white glitter [like clouds!]

I hope you liked my flowers, and thank you again for the opportunity, Rachel-Karina!! :]

Thursday, 17 November 2011

Day 13: Animal Print

Hi! I'm Juliet and I blog over at ever so juliet.

I was really pleased to be picked as a guest blogger - thanks so much Rachel-Karina! I'm going to continue the 31 Day Challenge, and show you my take on animal print...


Leopard print is one of the EASIEST nail art effects to do - it's really quick and easy to do, you can use any colours that you have, and you don't have to be really neat for it to look good!  Here's how you do it.


Step 1. Paint your nails a base colour. I've gone for a light yellow (so the leopard print effect will really stand out). I'm using Models Own lemon meringue which I really like, it goes on smoothly and doesn't need too many coats.


Step 2. Once your base is dry you can start adding the little splodges that make up the spots! I've gone for a lilac colour (so used two coats on each dot) and place these randomly around each nail. Try to leave space between each dot (better to have only a few than too many!), and put them in a slightly different position on each nail.


Step 3. Try to wait until these spots are totally dry (shouldn't take too long) then get your nail pen, kirby grip or cocktail stick (all are brilliant for this!) to draw little circles, c-shapes and dots around each of your splodges. Don't worry about being neat - this looks best when each nail is different and a little uneven.

Once you've drawn round all of your splodges, fill in any gaps with little black dots or c-shapes.


& that's it! It takes about 15 minutes (if that) and most of the time is spend waiting on the different layers to dry.


Juliet x